2014/04/21

A Journey through the Easter Trail

In this Easter season (I started writing this yesterday!) I thought I ought to take a break from the technical “how” of the trail, and remember the reason we did all of this – to share our faith in Jesus Christ with the primary school children audience in a relevant and engaging way. So here is a short impression of what the trail was like to experience, illustrated with some photographs from the Sunday morning when we ran the Trail for the regular St. David's Sunday congregation and Messy Church attendees to experience.

The journey started in the church hall (with a notice on the church door to re-direct anyone we didn't manage to catch!), where tables and chairs were set out for people to sit down and tea and coffee were served as people assembled. Whilst not the normal Sunday service, this is something we have done in the past (and had done the previous week in order to be able to set up in the church!).

Once most of the congregation had arrived, the Storyteller, in period Middle Eastern costume, introduced the event, explaining that the congregation would split into two groups and travel on a journey back two thousand years in time and to the streets of Jerusalem, a Jewish city under Roman occupation. The group assembled and headed off, out of the hall and outside to reach the main door of the church.


Entering the church from the porch, the group found themselves in the streets of Jerusalem 2000 years ago, outside a large Upper Room where a celebration of the Jewish Passover feast was just winding down. But, as the wife of the owner of the room told us we when got inside, this had not been quite the ordinary Passover meal. All the usual elements of the Passover celebration had been there, but Jesus had jolted everyone by adding to them – things that no-one expected. He had taken the bread, the ordinary flat unleavened bread of the Passover celebration, and had broken it, saying it was his body, broken for them. Not at all what was supposed to be done at a Passover meal.


Later on, Jesus had taken the jug of wine served with the meal, but he called it his Blood, shed for all for the forgiveness of Sins. Then he insisted everyone drank some, although no-one was very clear why, or what he was on about.

About this time, one of the Disciples slipped out, but without saying goodbye to anyone at the feast – which was a bit odd. Anyway, Jesus had said he wanted to pray, and took his Disciples off with him into the night. The wife of the owner of the room thought the most likely place they could have gone was the garden called Gethsemane, and suggested we try and find them there.


So we were lead out by the storyteller into the dark, narrow streets of Jerusalem, to make our way out of the City and into the moonlit garden of Gethsemane. We must have arrived quicker than Jesus and his friends, because no sooner had we arrived then we heard them coming through the trees and bushes, so we had to hide out of their way to see what would happen next.

Jesus left Disciples in a group and moved a little way away – directly towards us. I don't think he knew we were there, because he was praying very earnestly – in deep turmoil. He was begging to not have to do something, to have it taken away, if there was any other way. But he couldn't insist – God's will must be done, he kept saying. It was very dark, and a bit spooky. The disciples, meanwhile, were asleep – we could hear them snoring!
But that was nothing to what happened yet. There was a red glow of torches, and a noise of marching. Suddenly there were soldiers in the garden – we were definitely hiding now! They went to where the Disciples were, and there was some sort of scuffle. Everyone seemed to run off at that point, and the soldiers marched back away with their torches, taking with them whoever they had come for. We weren't that sure the soldiers had gone though, so we sat tight.

Next we knew, it was coming up dawn with the yellow glow of dawn coming up and birdsong. Then a cockerel must have woken up, because it crowed, two times together. Someone said that was a sign, although what of no-one seemed to know. The soldiers really did seem to have gone, so we sorted ourselves out and headed back into the City.
As we went, we came in sight of the place called Golgotha. It's a horrible place – we didn't go any closer than we had to, because the Roman Soldiers were executing someone there, hanging them on a cross of wood until they suffocated. We had had quite enough of soldiers so kept away, but there was someone else watching what was going on from a distance.

He was a man named Peter, and he was scared – really, really scared. He was one of Jesus' disciples and had been there in the Garden of Gethsemane, he told us, and the man the soldiers had taken away was Jesus – who had been in the Upper Room, and that Passover feast we visited. And now it was Jesus who the Roman Soldiers on Golgotha were crucifying. It didn't make any sense, to Peter (who was to scared to make sense of much) or to us. Jesus was a teacher, a good man, someone people looked up to. So how had he been sentenced to death so quickly, in just one night? Peter was all upset he had denied Jesus, three times before the cockerel crowed, he said. That same cockerel we heard crowing twice in the Garden. But someone else must have betrayed Jesus, must have done him in in a dirty little deal behind closed doors. Peter was off, back to his fishing boat, worried the soldiers would be on his tail next if stuck around.

So we moved on, back into the streets. Time was getting on, and the Jewish Sabbath was fast approaching, and no-one would be doing anything then. They kept their holy day very strictly, and with the way the Jewish High Priests enforced things you would have two. So to learn anything we would have to slip forward past the Sabbath day to the next day, Sunday, when the world would have to come to terms with what it had done in putting Jesus to death.

So we started early, heading off to another garden, not to far from Golgotha, where the grapevine said that they had buried Jesus, two days before after he was crucified. We weren't sure what we would find there, but we certainly didn't expect what did happen.

We were met in the garden near the tomb by Mary Magdalene, one of the women who had been in the group with Jesus. Not who we might have chosen to hang out with, but Jesus was like that – always accepting people most of use would have avoided. Anyway, Mary had obviously been crying – but she wasn't crying now. She was full of joy, laughing and talking. Apparently Jesus was alive! She had seen him die, like us, but there, that morning, she had seen him alive again! And sure enough, the tomb was open, his body was gone, leaving only the grave clothes behind. Suddenly the day seemed lighter, the garden full of flower and new life sprouting. Jesus had gone on to Galilee, his home turf, Mary said, and she had to go and find the Disciples to tell them to meet him there.
So off she went, leaving us to find our way back, back 2000 years and into the daylight outside the Church, but with a host of memories and experiences of those few days in Jerusalem, and what Jesus did for all of us, dying on that cross for all our Sins.

Christ is Risen! He is Risen Indeed!


More pictures are on St. David's website and my Flickr account.

Credits


An event like the Easter Trail is only possible through the hard work of a huge number of people, both on the days and over weeks either side setting up the church for the event and clearing up afterwards. There are no doubt people missing from this list, for which I apologise (if you know of anyone, please let me know).

Cast:

Storyteller – Reverend Trish Davis
Host at the Upper Room – Marjorie Ford
Peter – Richard Davis
Mary Magdalene – Bethan Case

Crew:

Technical Operators: Brian Pringle, Marion Clough, Hilary Ash
Off-stage Cues: Robert Pettigrew, Brian Hill, Bob Reynolds
Group Helpers: Hilary Ash, Elizabeth Pettigrew, Val Williams
Refreshments: Shelia Pugh, Pat Jolley, Barbara Owen
Craft Team: Enid Large, Jeanette Owens, Irene Wadeson, Lisa Gati
Technical Supervisor: Richard Ash
Photographs: Hilary Ash, Richard Ash

Set Up and Clear Down:

John Evans, Brian Hill, Judith Hill, Dot and Trevor, Irene Binns, Ray Sproston, Brian Jones, Val and Bob Williams
Production Co-ordinator: Judith Hill

2014/04/15

Command and Control II

On to lighting control. Implementing a full stage lighting control system would have been a huge project, but thanks to open source software it is rarely necessary to start anything from scratch. This was very much the case for this project, thanks to the Open Lighting Architecture project (OLA). This provides an open source set of tools for generating control signals, recording and playing them back, and interfacing them out to vast array of lighting control hardware. One of the developers (Simon Newton) even has ready-built Raspberry Pi images with the software installed and ready to go. The only missing piece was getting the DMX-512 control signals out of the Pi and into the right electrical format, via the Pi's on-board UART.

A search on the associated open-lighting discussion group indicated that various people had talked about this, been told it wouldn't work, and not actually tried it. Given that quite a lot of similar adaptors using the FTDI USB-serial chip to send DMX exist (and are supported in OLA), this didn't seem a logical position. The fact that the Raspberry Pi UART is integrated at a much lower level than a USB converter (with hardware interrupts and DMA available) should give it much better performance. So I decided to carry on and build such a system so the actual results could be measured.

Why DMX-512 is Hard

There are a number of reasons why producing direct DMX-512 output from a computer is considered hard, and software developers want to hand the task off to an external microcontroller running bare metal code. The key ones seem to be:
  • DMX-512 runs a a non-standard (for PC) baud rate of 250kbaud. Many computer UARTs cannot run at this speed, which makes them a non-starter.
  • DMX-512 uses serial break signals (periods when the line is held continuously in the '1' (non-idle state) to demarcate successive frames of data. These cannot be sent by just writing characters out of the serial port.
  • DMX-512 has relative tight timing requirements for various elements of the signal – if your computer suddenly stops sending data for a while, then the lights you are controlling may go out or flicker randomly.

Hardware DMX Output

The hardware side of sending DMX-512 is relatively simple – it uses simplex RS-485 (I am ignoring optional extensions like RDM). Simplex means that data only goes one way – the controller sends data, and everything else in the system just listens to it, with no answering back! RS-485 is a common standard for industrial serial communications, using a screened, twisted, pair of wires. Because RS-485 is common industrially, there are lots of integrated circuits which can translate from the transmit pin coming out of the Raspberry Pi (at 3.3V TTL levels) to the standard (higher) RS-485 levels. I used a Maxim MAX3158 line driver, because it provides isolation between the DMX control line (which will be connected to lighting ground) and the Pi (which will be connected to audio ground). For a simple project like this, isolation isn't required, but it can be very useful in avoiding humming audio and flickering lights on larger projects. I also had got hold of some at a good price!
RS-485 output schematic (pdf | svg)
The schematic is mostly just taken from the data sheet. Power is supplied from the Pi's 5V power supply, which is converted into an isolated power rail within the chip, and used to feed the output stage. R1 “softens” the connection between the output cable ground and the line driver, as recommended in the data sheet. R2 and C4 link the Pi ground to the DMX ground at high frequencies (to minimise interference) and provide a backup ground path if no other ground exists.
R3 is the DMX line terminator, to minimise reflections on the DMX cable, and needs to be the ½ W part because it gets quite a lot of current through it when the full output voltage is being driven.
Part Value
C1, C2 100 nF 100 V
C31 µF
C410 nF
C5 100 nF
R1 100 Ω ¼ W
R2 47 kΩ ¼ W
R3 120 Ω ½ W

This all worked straightforwardly – each byte sent out of the Pi's serial port was translated through to RS-485 levels on the DMX output connector, with no sign of ringing or waveform distortion.

DMX Output Plug-in

So back to those things which make software developers avoid direct DMX output. Before we try to start, we need to stop the default Raspbian image from using the serial port as a text mode login screen, by following these instructions. With that done and rebooted, I no longer got random data coming out of the UART.
The first software challenge was to get the UART outputting data at 250kbaud. The maximum speed seemed to be limited to 115.2kbaud, until I found a post on how to run the Pi UART at 1Mbaud which explained how to increase the clock speed of the UART. So do as it says, and add the line
init_uart_clock=16000000
to /boot/config.txt and reboot your Pi (again). This raises the clock limit, but we can still only get the “standard” speeds of 230.4kbaud, 460.8k, 500k and 576k – no joy at 250k. The setserial utility seems to support custom rates, but they don't work in practice. There is a plaintive little message in
the system log
Feb 22 18:55:02 lightingpi kernel: [ 4519.973048] seterial sets custom speed on ttyAMA0. This is deprecated.
What it doesn't say is that setting the custom speed also doesn't work on the Pi UART! After much puzzling, I found a stack overflow post describing how to use the Linux-only termios2 interface to set arbitrary baud rates (this is what you are supposed to use in place of the depreciated setserial method, if you can find out about it). This works, although writing a C program to use the termios2 API has several more “surprises” in store for the unwary.

With the proof of concept in place, on to using it in OLA. OLA has pretty good developer documentation and a detailed log of creating another OLA output plug-in. Between these, it was fairly easy to work out that most of what I was doing could be copied from the existing plug-ins, mostly that FTDIchip output driver I found near the start.
After all messing to get the correct speed, integration into OLA was very smooth, once I did all the things listed in the instructions to register my new plug-in, there it was in the output of the ola_plugin_info command:
Id Plugin Name
--------------------------------------
1 Dummy
11 E1.31 (sACN)
15 SPI
10000 UART native DMX
--------------------------------------
(10000 is the dummy ID for testing, it will only get a “proper” ID when the code is accepted back into upstream OLA development). The source code to my forked copy of OLA with the Pi UART plug-in added can be found on Github here. commit a4959cc46d is the version which was used at the trail, although there has subsequently been a new version of OLA released upstream (which I need to update to).
Once OLA was compiled with the Pi output plug-in, it needed to be enabled (the plug-in is deliberately disabled by default), by creating the configuration file /var/lib/ola/conf/ola-uartdmx.conf
which contains just two lines:
device = /dev/ttyAMA0
enabled = true
(there are some other advanced options, but you probably don't need them).

Moment of Truth

You should now have the UART native DMX output device visible in the OLA web GUI, so you can connect it to Universe 0, and use the web DMX console to start sending some output. With any luck, you should be able to fade up your light(s)! The fade won't be very smooth, because the faders only update from the browser a few times per second, but it proves you have control. You can get more detailed control (and timed fades) with the ola_dmxconsole command line tool which is included with OLA.
Next time, I will look at the how I created audio and lighting files to play back through this system.

2014/04/14

Command and Control I

The Design Journey

Having decided what we wanted to do in Gethsemane, the next questions were practical. How was this array of technology going to be controlled? Who was going to be available to work it? Where was it all going to be put?

The latter two factors fairly rapidly ruled out several options. The control and sound equipment (other than the loudspeakers) had to go in the bottom of a fitted wardrobe at the back of the room. This, together with volunteer availability, ruled out a full-time human operator. The volunteers available to run the trail (6 classes spread across 3 week days, plus an additional Sunday run) were not theatre or computer technology experts – perfectly happy using their computers and phones for email, but not going to be happy with a copy of MagicQ. So conventional computer control was not a good idea either. What was needed was something much simpler – one button to start things happening, and an emergency stop if needed. This would let one of the helpers press start at the right moment, and not require a dedicated lighting / sound operator.
Sound and Light control equipment in the cupboard
Given this, how? Designed-for-purpose lighting control equipment is a niche market, with correspondingly high prices (even on ebay!). But DMX-512 is ultimately just an RS-485 serial bitstream. How hard could it be to produce this, along with sound playback? Connecting up physical buttons for control of computers has been a rather expensive and difficult business, but the Raspberry Pi single board computer has changed all that – easily accessible pins for connecting buttons and lights to, and lots of help for writing the programs to link it all together. Better still, the Raspberry Pi has a built-in serial port, so we wouldn't even need a USB adaptor to connect the DMX output up!

So the “plan” took shape. All that was left now was to design and build the various bits of hardware and software needed to make it all work. As usual, some things went easily, and others took more work, but in the end it all worked – as seen in the previous Blog post.

Push Button Control

This was actually the second area to be tackled, but it was much simpler so I will describe it first. It is also probably more widely re-usable! The design ended up with two sets of controls and indicators: one set to switch the Raspberry Pi on and off safely (it is still a computer underneath!) and a second one to control the lightning and sound playback. Switching on is easy – because the Pi switches on and boots up a soon as power is applied to the board. So the only control needed was a way to tell it to shut down, and then indicate to the operator that it was safe to turn it off at the mains. The latter is important, because we did not have a monitor or screen, so there was no direct way to tell if the Pi was still running or not.

Power Button
This was relatively easy to solve however, with an LED (and resistor) connected from one of the GPIO pins to ground. These pins default to being inputs when the Pi starts up, so the LED is off. When the Pi is shut down, they go back to being inputs, so the LED is also switched off then. So all our program has to do is make sure that the LED is switched on when the Pi has started up and is ready for action. As we don't need to switch the Pi on with it's power button, our program just needs to start when the Pi is ready and watch the power button. When the button is pressed, it tells the Pi to shut down, and exists. There is no need to go back to watching the power button, because the system is about to shut down!
Lift the lid and press to shut down
The power button I used was a reset switch salvaged from a piece of scrap equipment, hence the transparent hinged cover to prevent it being accidentally pressed (useful!). It was too awkward to cut the large square hole required for the switch in the (temporary) case, which is why it is fixed to the outside of the box (it only has 3.3v across it, so safety is not an issue). The ready LED was fitted through a hole in the case and fixed with some hot glue on the inside. This main box lived in the cupboard with the other equipment, because it only needed switching on at the start of the day and off at the end.
Playback control unit

The rest of the controls (for playback) were fitted to an smaller box, which was hung on the wall in the room (where the helpers could find it) and connected by a length of 4-core cable back to the main Pi controller unit. This box was also made from the available bits, hence the extra holes in the front panel. To make it more user friendly it was re-painted with a left over can of car touch up paint, then rub-down dry transfer lettering (“Letraset”) used for the labels (my packet is not genuine, it came from a clear out, and was originally from RS). The shiny ring round the “Running” LED is simply a washer used because the hole is too big for the LED otherwise! Once the lettering was on and before the components are fitted, a coat of clear spray lacquer (again for car touch-up) stops it rubbing off. The result looks quite retro, but is serviceable.

The Circuit

The circuit diagram shows the connections for both the power control and the remote playback controls. The DIN connector linking the two was chosen simply because I had plenty of them around, and they don't fit anything else, so cross-connection was unlikely!
Circuit diagram for control buttons (pdf | svg)

 
The component values are in the table below:

Part Value
R1, R2, R3, R5 1 kΩ ¼ W
R4 100 Ω ¼ W
R6 10 kΩ ¼ W
D1 5mm Yellow LED “Ready”
D2 5mm Green LED “Running”
S1 Momentary push switch “Shutdown”
S2 Momentary push switch “Start”
S3 Momentary push switch “Stop”
T1 BC184L transistor
C1, C2, C3 100nF ceramic capacitors

The GPIO pins used are summarised in the table below. They are chosen to avoid using any pins which might be wanted for peripherals in the future (UART, I2C and so on) and to stick to the ones which didn't change between the original model B and subsequent versions of the Raspberry Pi (because I have one of each!).
Broadcom GPIO Header Pin Function
GPIO 23 16 Shutdown Button (pulled low)
GPIO 24 18 Start Button (pulled low)
GPIO 25 22 Stop Button (pulled low)
GPIO 4 7 Play LED
GPIO 22 15 Ready LED

Basic Pi


I'm assuming you can get your Raspberry Pi powered up and running without help from me – there are lots of much better guides out there on the web.

I used the standard Raspbian distribution for the Raspberry Pi because it was the easiest route to get things working. This had pretty much everything I needed, and it was easy to install the extras: WiringPi (following Gordon's instructions) and mplayer (with apt-get). I plugged in a WiFi dongle to connect the Pi to my home network and then logged in that way, but you could equally use a screen and keyboard, or a wired network connection.

Programming the Buttons

With the hardware design in place (or at least on solder-less breadboard!) we need some software to make it work. The path of least effort seemed to be to adopt the gpio program from Gordon Henderson's WiringPi project, and write some simple shell scripts to go with it, as I don't really do Python and C is far too much like hard work for such simple tasks.

The resulting scripts are on my Github. They are all intended to be put into /home/pi/. Just doing this won't make anything work, because they aren't running. As each of the scripts waits for a single button to be pressed, they all need to be started when the Pi boots up, and stay running in the background until you press a button. Because they use the “Wait for Interrupt” mode to wait for the button to be pressed, they very very little resources (unlike many of the examples, which keep checking (“polling”) the button, which can make everything else on the Pi go sluggish – which we can't afford).

To start the scripts when the Pi starts up, we add some lines to the /etc/rc.local script. This is a script which is included in the standard Raspbian distribution specifically for end users to customise with commands that they want to run when the system starts. Note they run before anyone is logged in to the system, which is good for what we are doing, but means there will not necessarily be anyone around to see what they do. If something here doesn't run correctly, there isn't an easy way to stop it running next time you start you Pi, so you might have to do some complex tricks to get your Pi back. Be careful!

First off, we want to run our shutdown.sh script, and we need to do it as the root user, so it has the permissions to be able to shut down the Pi (so we don't need to use sudo). This is easy, because the rc.local script is run as root. Any commands added to this script must complete before the system is considered ready, so we have to put our shutdown.sh script in the background, where it can keep running. So we add a line to /etc/rc.local like this:

/home/pi/shutdown.sh &

The & character is important – it makes the script run in the background, like we need it to.

The other scripts, for playing and stopping, need to run as the pi user (the default login), so we need to switch user before running them, so their lines go:
su pi -c '/home/pi/stop.sh' &
su pi -c '/home/pi/play.sh' &
The su command switches user (to the pi user) before executing the specified command. Again, the & makes them run in the background.

The other file is buttonsets.sh. This is important because it contains the settings (like which GPIO has which button connected to it) and file names (what sound file should we be playing) which all the scripts need to know about. This file needs to be put at /home/pi/buttonsets.sh so that the other scripts can find it.

Anything you are likely to need to change, should be in here, so you only have to edit one file to customise your Pi controller. The thing you are most likely to need to change is the soundtrack file, which needs to be the name of a sound file stored on your Pi so that it can be played back. You can ignore the rest for the moment.

Try it out

Hopefully you have already got mplayer to play some sound back, and set up some way to hear it (like some speakers plugged in to the audio out jack on your Pi). With this done, shut down your Pi, turn it off, and switch it back on again. After 30 seconds or so (which will seem like much longer!) it should have started back up, and you will see D1, the yellow “Ready” LED, flashing. Why is it flashing? Because some of the files listed in the buttonsets.sh file are not available on your controller, and the lighting control won't work. We will deal with that in a little while.

The sound should be ready to go (assuming you loaded a sound file and put it's name in the right place), so press the “Start” button. The green “Running” LED will come on, and you should hear the sound playing! You can let it play to the end (when the “Running” light will go out), or you can press “Stop”, which will cut the sound off, and put the “Running” light out straight away. Once playback has stopped, you can start it again, but you can't start playback more than once at the same time – the scripts have a lock to make sure that doesn't happen by accident.

The next post will look at how the DMX-512 lighting control was achieved.

2014/04/13

(Un)staging Gethsemane

So how did we actually create the Garden of Gethsemane at night? The Frodsham churches had done a lot of work on this, putting together a sound track CD of foley sounds, with a running time of about 4 minutes. This provided the “narrative” underpinning of the scene, as we hear:

  • The arrival of Jesus and Disciples
  • Jesus coming closer (away from the other disciples) to pray
  • Jesus praying
  • The disciples asleep
  • The arrival of the soldiers to arrest Jesus
  • The arrest and subsequent scuffle
  • The disciples running away
  • The departure of the soldiers
  • (later) The rooster crowing as dawn comes.
Many of these points will be brought out later when we meet Peter at Golgotha, so it is not essential that the children catch all of them. The set was simple, consisting only of some dark blue plastic sheet used as backdrop and lots of evergreen branches from a bay tree (because they were available to hide the walls of the vestry. To give the impression that the action is going on just beyond the next bushes in the olive grove, the light comes from a hidden source at the end of the room, whilst the speakers for the sound track are placed at both ends of the room to give an immersive sound experience (helped by hard brick walls which reflect the sound around to come from all directions).
Gethsemane - backdrop and branches
The whole lighting and sound set-up was run to a pre-defined script by a Raspberry Pi computer (see subsequent posts).
The real Garden of Gethsemane would have been very dark at night, with no artificial lighting. So the set only needs enough light to ensure that people can get in and out of the room safely, and to support the cues in the sound track. To provide the ambient light, we used a 35mm slide projector to project a moon onto the wall of the room. The reflected light from this (zoomed relatively small) provided enough illumination to let people see in, but no more.
Gethsemane - moon
An “LED PAR can” stage light was used to provide the other lightning cues. This was an RGB fitting, with separate dimming for each channel built in, controlled over the industry-standard DMX-512 interface. This meant that (almost) any colour, and any brightness, could be produced on demand, and varied in real time through the scene.
The video below gives a flavour of what the resulting scene was like (shot after a run with no people around – normally the floor would have been full of the audience sitting listening). Thanks to Robert Pettigrew for taking the video for us.

The video does not capture all of the lighting (because small room made in impossible to fit everything in the camera's field of view), but gives an idea of what it was like to feel the light changing around you as events unfolded. The sound track is just from the camera microphone – the real thing (CD available here) is more dynamic and less tinny!
Gethsemane - dawn lighting cue
The still photographs capture more of the lighting colours, but not the changes between them. More photographs can be found on Flickr.

An Easter Trail at St. David's

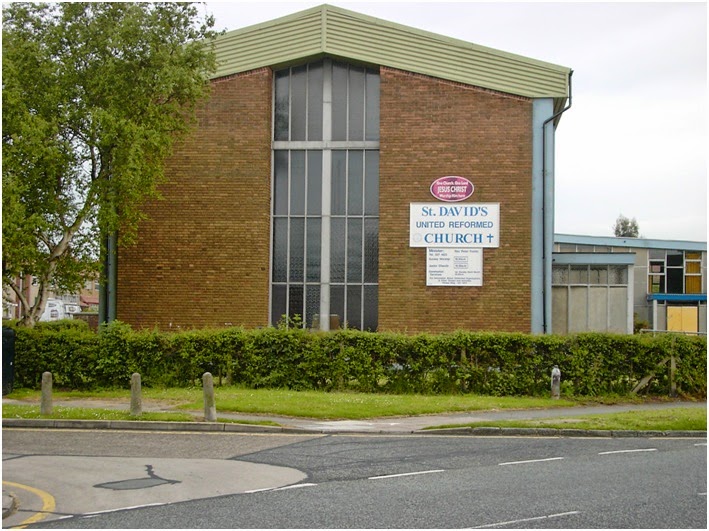
Eastham has been a village for centuries, and retains it's historic parish church. After the second world war, a large council estate was constructed as part of re-housing efforts in nearby Birkenhead. St. David's United Reformed Church was founded at this time and has been worshipping in the area ever since. The current church and hall building complex were built in the 1960s, and as such are not typical “church” architecture.
Outside of St. David's Church

Today there is a relatively small Sunday congregation (less than 40 members on the roll), a monthly Messy Church, and other affiliated groups using the premises. From this base it was obviously necessary to stage the Easter Trail in a way which was within our resources. We had the advantage that the church building is not heavily used (unlike the hall) and so with some negotiation we were able to have complete occupation of the church for a three-week period. This gave us a week (and weekend) either side of the Easter Trail sessions themselves to set up and dismantle the trail, making it easier for those with full-time jobs to be involved.
To convey the the key aspects of the Easter story, we thought four scenes were necessary (others have had more scenes). These were:
  1. The Upper Room, scene of The Last Supper
  2. The Garden of Gethsemane
  3. Golgotha, scene of the Crucifixion
  4. The Resurrection Garden, scene of the Empty Tomb.
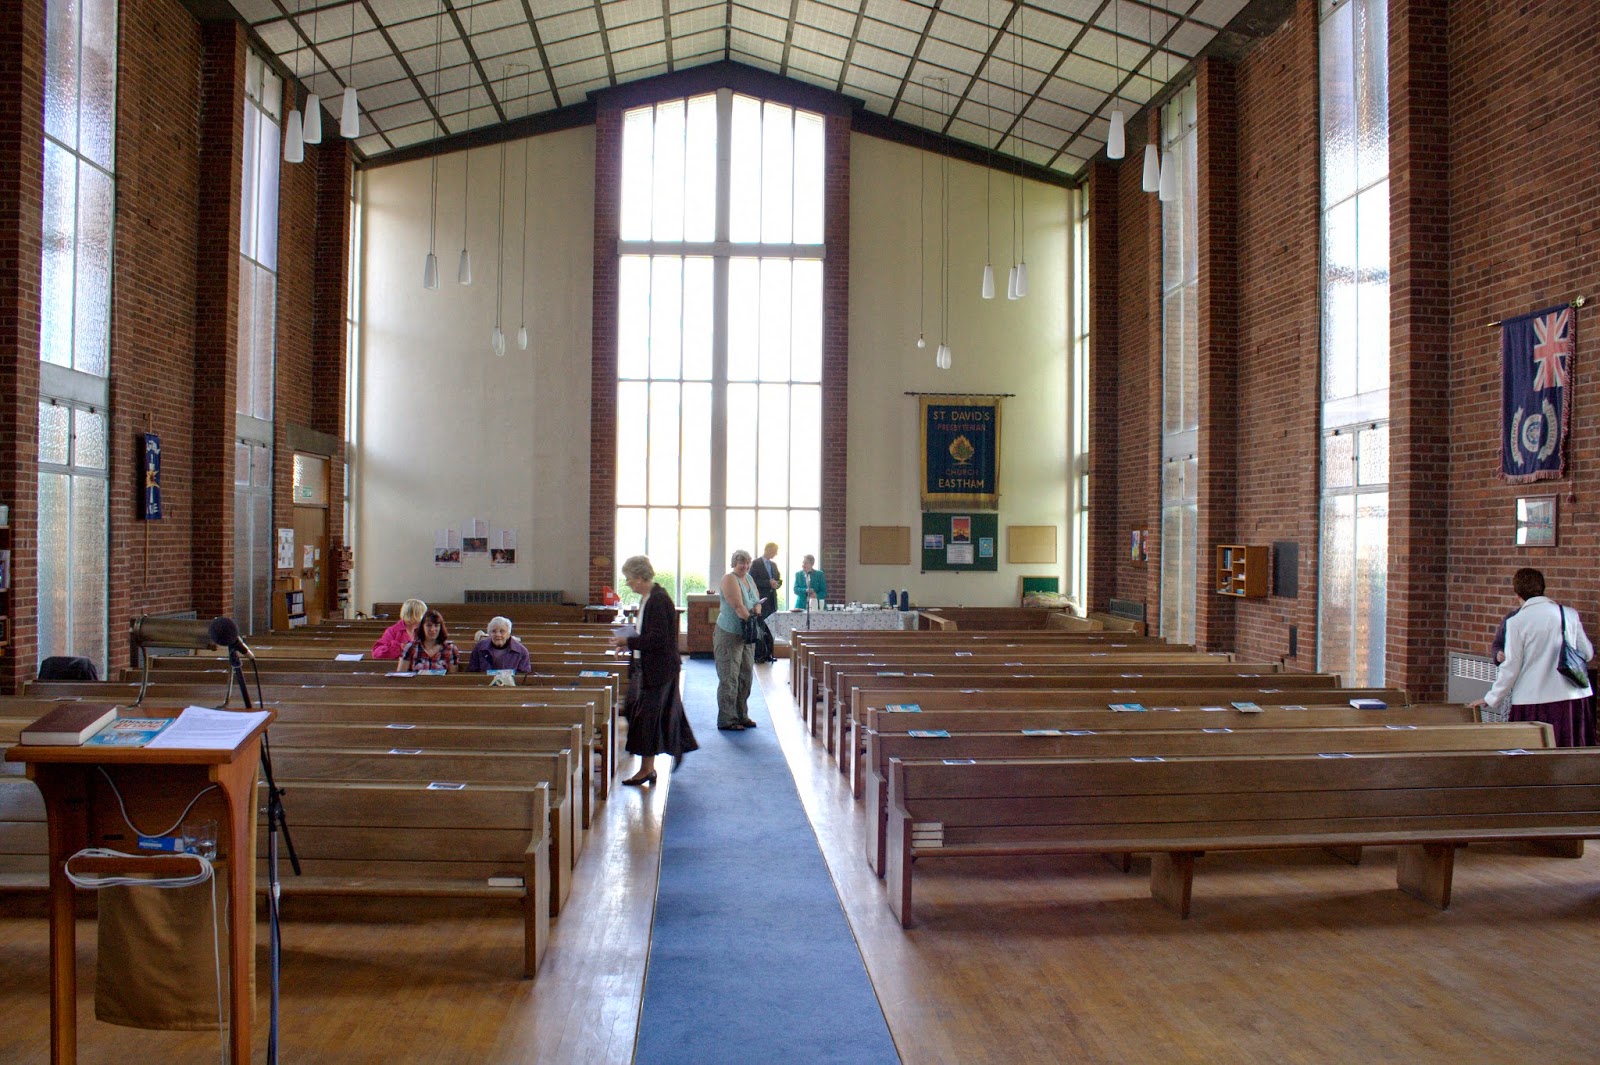
Inside St. David's Church
Through these the key events from the last supper through Jesus's anguish, Crucifixion and Resurrection over the 4 days at the end of Holy Week can be told. Inevitably there are omissions and compressions in doing this, but there is also a limit to the amount which the audience can be expected to take in, emotionally and intellectually.

Unlike many traditional church buildings, St. David's has large windows on both sides and the liturgical west end, making it a very light space and impossible to black out in the conventional theatre manner. Although the pews are not fixed to the floor, they are large and heavy enough to make moving them out of the building impossible, so we were limited to re-arranging them on their normal floor space. Usefully, the communion table is not fixed and relatively light so it can be re-arranged as required.
A large Gazebo / tent set up within the church provided the setting for the Upper Room, giving a sense of indoor space and scale which the open church does not necessarily have. We told the story of this scene from the perspective of the wife of the man who owned the room, who was hosting the passover meal.

From here, pews were moved to line a walk-way taking the audience through the streets of Jerusalem to Gethsemane. Black fabric screening (supported on the pews) gave tall enough walls that it was not possible for the audience to see out across the church.
Gethsemane was staged in the vestry, as the only place in the church which could be successfully blacked out (as the windows are much smaller and lower than the main church). This scene did not have any cast, but rather relied upon soundtrack and lightning to convey the experience of hearing Jesus praying in the Garden, then his arrest by the soldiers who take him away. From here the audience come back out at the front of the church.
The open area created by moving the communion table was used to stage Golgotha. The centre piece of this was the white front wall of the church, lit red using floodlights. In front of this stood a large dark cross in near silhouette. This was enclosed on both sides by tall black stage flats (borrowed from the hall). This (with the back and top open) did not shut out all the light, but removed direct sunlight. The story hear was told by the disciple Peter, watching in fear from a distance as his Lord and Master is crucified, but too afraid to approach the Cross after his betray of the night before.
The audience move back out into the streets of Jerusalem, where the storyteller explains the passage forward in time from Friday to the Sunday morning, before carrying on to the garden where Jesus' body had been laid in the tomb.
The final scene is the Resurrection Garden, where the audience are met by Mary Magdalene, who has discovered the empty tomb and encountered the risen Jesus walking in the garden. The Garden was formed from a set of pale blue display boards (which form the background and sky) with a carpet of potted plants and flowers. The scene was positioned to make maximum use of the natural light in the church, backed up by bright floodlighting to cope with grey days, and ensured this was an uplifting end to the experience, before the audience left via the door they came in through.

2014/04/12

An Easter What?


This is my first adventure into blogging. I hope it will form somewhere to record the experience, mainly technical, of running the Easter Trail at St. David's United Reformed Church, Easter. I hope it will inspire others to try something similar, and provide some assistance to those doing so.
So first of all, what is an Easter Trail? The idea (sometimes called an Easter Journey) is not ours – it comes from a number of other organisations, including Frodsham Churches Together and the Bible EncounterTrust. The aim is to create an engaging, immersive presentation of the Christian Easter Story, aimed at late primary school children from non-church backgrounds. It aims to present the events of Holy Week, the Crucifixion and Resurrection in a way which captures the children's imagination, and leaves a lasting impression upon them. This is something that all schools have to cover as part of Religious Education, but often struggle to do. Our experience is that schools are very receptive to Churches offering to help with this, which provides the churches with an outreach opportunity.
In Gethsemane
In “Arts” terms the Easter Trail is a piece of Promenade Theatre – the audience are split into small groups, who are lead by the “storyteller” from scene to scene through dramatic re-creations of the key locations in the Easter story. In each they meet actors in costume who play characters from the story and tell their section from their perspective. The audience is then lead onwards by the storyteller.
Empty Golgotha
For each scene a combination of scenery, lighting, sound and props are used to convey the atmosphere and engage the audience's imagination. Not every scene needs all these elements, but the combination of scene and cast needs to hold the audience's attention and communicate the key points of the Easter story.